Tuesday, April 15, 2014

MSCR NEW TRACK PLANS

Just like my last layout, I wanted my new layout to have a lot of switching and be capable of just sitting back and watched trains just roll. I was just gonna rebuild the old layout in my new house but the way my basement is set up, I needed to keep areas of it as open as possible due to the bar and giant screen TV to entertain folks. So the old MSCR track plan was out but after searching the web I did find two track plans that I could modify to fit the spaces I would have avalible for the layout.

FRENCH BROAD VALLEY


The French Broad Valley was my first choice because of the continuous run capability, staging tracks, and plenty of industries to switch. All I would have to do is broaden the cruves a little and add a yard to it. Then I found this track plan which is about the same as the French Broad Valley that used sectional track like my Kato Unitrack. Some things are hard to give up!! 


Only thing I had to do is add a yard, industries, and staging then I would be set. Here's what I came up with to fit my 6' x 10' space.


HOMER TRACK PLAN


The focal point of this layout would be Homer, Mi, where the MSCR split going to Battle Creek, Mi., and Elhart, Indiana. I would be able to run two trains to and from those cities dropping cars for the industries in Homer to be switched by a dedicated switcher. To me this is just a bigger version of one of my favorite door layout, the Carolina Central.

As you can see it was doable but I couldn't get the kinda yard I wanted into this plan, plus those S-cruves coming out of the siding would probably be an issue with modern equipment. Also, I wouldn't need all the locomotives and cars I have for this layout and I'm not willing to part ways with them unless I have no choice to do so.

The layout for the 8' x 12' area is the one that I plan on building. It has everything that I want, switching, main line loop for continuous running, a yard, and an engine terrminal for all the locomotives I have. Unlike my old layout which had different cities along the way that I could switch, this one would only be centered around Moscow. I'll still be able to make up and break down the three trains to and from Toledo, Battle Creek, and Elkhart, from Moscow Yard.


MSCR TRACK PLAN


  • Name: Michigan South Central
  • Scale: N (1:160)
  • Size: 8' X 12'
  • Locale: South Central Michigan
  • Era: Present
  • Control: Dual cab
  • Layout Height: 50" to 52"
  • Layout Style: Along the wall shelf
  • Benchwork: L-girder
  • Track: Kato Unitrack
  • Turnout minimum: #6
  • Minimum Radius: 12.375
  • Maximum Grade: 0%
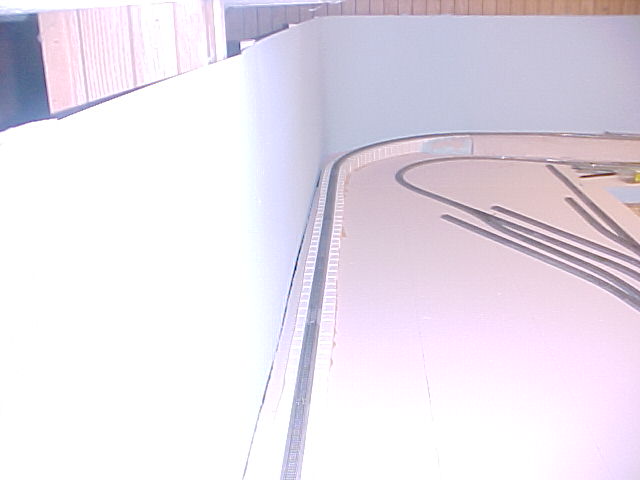
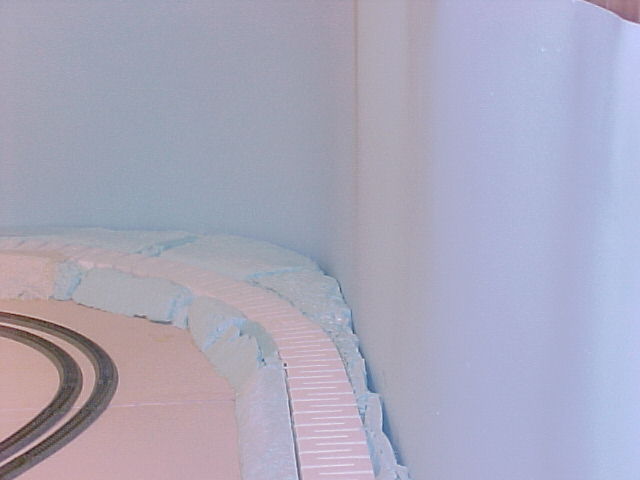
  • Backdrop: Brush painted vinyl flashing


  • CARLETON RAILROAD

    Long time no post! I've been spending these months looking for a track plan that would fit the spaces I have avalible for my new layout. One's a 6' X 10' space and the other is for a 8' X 12' space. I was thinking about an ISL, which have become so popular amongst modelers. The only problem I see with an ISL is that you can't sit back an watch trains roll. Plus I would have to get rid of a lot of locomotives and cars that i savaged from the fire that wasn't destroyed. Also, the Michigan South Central won't work as an ISL which means I would have to come up with a whole new railroad. I did make up two track plans for an ISL to fit both spaces based off a track plan I found on the Layout Design Gallery website called Alcos in the Alcove.


    The two track plans is for a freelanced industrial railroad that I call the Carleton Railroad. I got the idea for the Carl from how the Effingham Railroad was created. The Carl would serve a newly built industrial park located west of Flat Rock, Michigan, and northeast of the city of Carleton, Mi., and I-275. The Carl would serve the area south of where Guardian Industries has a large glass making facility. Just like the Effingham RR, the Carl would interchange with the two same railroads, CSX to the west and Canadian National to the east of the industrial park.

    CARLETON RAILROAD


    6'x10' CARLETON RR


    8'x12' CARLETON RAILROAD

    I really gave the Carleton RR a lot of consideration as being my new layout because I really do love switching but sometimes I just wanna kick back and watch trains roll and I can't do it on a layout like this. Maybe some could use these as an inspration to build their own ISL. 


    Saturday, November 9, 2013

    FIRE

    It's been awhile. On August 31, 2012 I lost my childhood home due to a fire. Nobody was hurt which was the most important part.  A combination of the fire and the fire department destroyed the basement where my layout was. The layout was mostly damaged by the ceiling tiles falling from the water from the fire department. I was able to save most of the locomotives, cars, and track. Happy about that!

    We as a family ended up staying with my god sister in the her home, then ended up buying it 6 months later. Our new home has a way bigger and better basement for my new Michigan South Central Layout.

    For my blog, I decided to keep the information of the old layout with labels beginning with OLD MSCR. Now it's a new chapter and a new layout........CAN'T WAIT TO GET STARTED!!


    Tuesday, June 12, 2012

    INDUSTRIES REVISED AGAIN

    After operating the railroad with the way it was revised it just working out by having Box Corp. Of America in Hanover. To many cars needed to be switched into the right order and its on a grade which caused a lot of derailments pushing cars up grade into BCA or Hanover siding. I moved BCA back to Pulaski and moved Roll Form to Hanover. This should be the last of moving industries around on the layout. HOPEFULLY!!

    BOX CORPORATION OF AMERICA

    ROLL FORM, INC.

    I once again change the track plan in what I'm gonna call Track Plan 5.0 to show the revisions I've made. I also made changes to the East Yard in Moscow and the holding tracks for Imperial Canin in Homer. You can get a up close detailed version of Track Plan 5.0 by clicking on the the MSCR Track Plan in the right hand column. 

    TRACK PLAN 5.0


    Sunday, June 3, 2012

    LOCOMOTIVE ROSTER


    I'M BACK!!!!! Never thought that it was gonna be long droughts between postings. So let me give you something new, my All Time Locomotive Roster for the MSCR. I been collecting info on how the real shortline railroads that started around 1976 purchase their locomotives. Take the Hillisdale County Railroad now Indiana Northeastern Railroad started with GP7s and GP9s and acquired the same size locomotives along the way with the GP30s being its largest power acquired. Now the Michigan Northern was all over the place when it came to purchasing locomotives. It started with a couple of Alcos, then went with Baldwins, operating the last two RF16 "Sharks". Finally settling on GP7s.

    I wanted to incorporate the locomotives that I've purchased through out the years into my MSCR roster. I had a couple of GP9s, a GP20, a GP30, two GP35s, and two GP40s. I was gonna sell the GP20 and GP40s on Ebay so I could purchase a couple more GP35s and a GP35 shell to replace the GP30. I was picturing the MSCR looking like the Housatonic Railroad, a favorite of mine. After looking at the prices of new locomotives I knew that it was no way I was buying anything else unless it was dirt cheap off Ebay. 

    After looking at the Georgia Northeastern's roster of ten units, I decided that I wanted the MSCR to resemble theirs. A number of old high hood units and rebuilt low nose units running together. I ended up getting a GP7 and a GP20 off Ebay bringing my roster up to ten.

    I put together an all time locomotive roster for the MSCR as if it had really existed in the real world. The roster is based on the current models I have and if I wanted to back date the layout to an earlier period the models I would want on the layout.

    ALL-TIME MSCR LOCOMOTIVE ROSTER 
    1976-2012
    ALL TIME UNITS  - 21
    CURRENT UNITS  - 10


    Saturday, February 25, 2012

    MSCR HISTORY

    THE MICHIGAN SOUTH CENTRAL HISTORY

    The one thing about modeling a freelance railroad is that you have to write the railroad's history to the point that it could have existed. In my case with the Michigan South Central it was easy because of some key factors in history.

    The Central Factor.
    DT&M was controlled by predecessors of the New York Central Railroad. Instead of being abandoned in the early 1930s it could have easily been merged and operated by the NYC (later Penn Central) as the DT&M Branch.

    The Conrail Factor.
    New York Central merged with the Pennsylvania Railroad on February 1, 1968 to form the Penn Central Railroad. This was done with the intention of strengthening both railroads but had the reverse effect. By 1970, Penn Central was in bankruptcy and track conditions and service deteriorated. Conrail was formed to keep up rail service on parts of Penn Central and several other bankrupt eastern railroads.The creation of Conrail in 1976 was a milestone year for railroading in Michigan. Thousands of miles of branch lines owned by Conrail's predecessor roads were to be cast off and abandoned. The DT&M branch could have been one of those branches.

    The State of Michigan Factor.
    Unwilling to see many communities left without rail service, the State of Michigan stepped in to maintain this service. Initially, the state acquired several segments of track (which became the Hillsdale County Railroad and the Michigan Northern), and on others supplied a subsidy for Conrail to keep operating them. This factor would have kept the DT&M Branch alive as a new railroad.

    The Michigan South Central Railroad.
    The Michigan South Central Railroad (MSCR) was formed in December 1975 to take over operation of the DT&M Branch of the former New York Central Railroad between Battle Creek and Dundee, Michigan. The line was not slated for inclusion in Conrail and it was purchased by the Michigan State Highway Commission to maintain rail service in the area. The MSCR began operation on April 1, 1976, which was also start-up day for Conrail.

    The MSCR was given a 10 year lease from the State of Michigan and the money to rebuild the entire 96 mile rail line. Four F7As acquired from Penn Central provided the motive power for the line.

    Operations were straight-forward. Train MB-1, Moscow to Battle Creek, operated  Monday-Saturday to interchange cars with Grand Trunk Western in Battle Creek, while switching industries along the way, then returning immediately as train BM-2. After any necessary switching in the Moscow yard, a new crew boards train MD-2, Moscow to Dundee, where cars was interchanged with the Michigan Interstate. Train DM-1 would then head back to Moscow, switching a few industries on the way.

    In 1982, Conrail filed to abandon most of what remained of the Michigan Air Line Branch, between OD Tower near Jackson and Three Rivers. Seeing an opportunity for expansion and to gain new traffic, the MSCR was able to convince the state to purchase the line from Homer to Three Rivers Jct. Trackage rights was granted from Three Rivers Jct., over Conrail's Kalamazoo Branch to get into Conrail's Elkhart Yard, to interchange cars. 

    The MSCR operated the Three Rivers line with train ME-1, from Moscow to Elkhart, on Mondays and Thursday nights with the crew tying up for a rest. They return east as EM-2, from Elkhart to Moscow on Tuesdays and Fridays. 

    In 1986, MSCR renewed its contract with the State of Michigan by signing two 10-year extension to continue to operate the lines for the state. When this contract became effective in 2006, another two 10-year contracts was signed calling for the MSCR to be the designated operator of the lines through the year 2026.


    Monday, February 20, 2012

    INDUSTRIES REVISED

    I finally made up my mind on what industries will be on  my Michigan South Central layout. I moved a few of them around to take advantage of space and the numerous of siding I have on the track plan. This caused a revision in Track Plan 3.0 which I thought was my last.

    MSCR TRACK PLAN 4.0

    You can view an up close and detailed version by clicking on the MSCR Track Plan in the right column.

    HOMER TEAM TRACK

    I still wasn't happy with the short siding that was still at the edge of the layout in Homer on Track Plan 3.0 so I turn it inward and moved the team track  from Moscow to here.

    IMPERIAL CANIN
    I chosed  the dog food plant over the brewery because of the volume of inbound traffic into it.

    GREAT LAKES PLYWOOD
    I went in a completely different direction and away from a steel processor to a plywood distributor base on Inland Plywood's facility in Pontiac, Mi. It would make Pikestuff proud because the type of buildings being used. I got the idea from a posting under Industries Along The Rails in my favorite forum now, Big Blue.

    U.S. AMMONIA
    At Pulaski, I kept the ammonia distributor but changed the name to U.S. Ammonia.

    ROLL FORM, INC
    The big change was the replacement of Temple Inland with an automotive parts supplier called Roll Form. This industry is base on a company called Shape Corporation in Grand Haven, Mi., that makes bumper beams. Shape doesn't have direct rail service but ships its product by rail in 60' Hi Cube Boxcars through a warehouse company in Grand Haven call Bay Logistics, which in its own right would be a nice industry to model because it also receives a lot of boxcars of newsprint. I found this tread on another forum, Railroad Fan, that gave me the idea to model this industry. My version of this industry is rail served and will be receiving coil cars of steel on the first track and shipping bumpers in 60' Hi Cube Boxcars on the second track.

    BOX CORP. OF AMERICA
    I moved Temple Inland to Hanover and gave it a new name, Box Corporation Of America. By moving it here I will be able to use the short double ended siding to hold cars until needed by the plant, just like the prototype does in Biglerville, Pa.

    NULINE PACKAGING
    The bleach packaging plant that was in Hanover is now in Moscow with a new name, NuLine Packaging. I went away from the one track arrangement of the prototype and added a second track for shipping boxcars of bleach.

    I'm basically happy with the choices I've made for the industries and the track arrangement on the layout, now it's time to get rid of the cardboard mock ups and build them in plastic.


    Saturday, December 11, 2010

    INDUSTRIES

    Wow! It has been a long time since I posted something new. I've haven't really had time due to my J..O..B. I'm glad that I got rid of my website and went to this blog, money saved! Over the past few weekends I did manage to build some cardboard and plastic mock ups of the industries that will be featured on the layout.

    Imperial Canin or Imperial Brewing
    Homer will have two industries which I haven't really made up my on what they are going to be. The first industry could be a brewery called Imperial Brewing or a pet food manufacturer called Imperial Canin. They both use similar kinds of cars, covered hoppers, corn syrup tank cars and insulated boxcars. If I go with the pet food manufacturer, it would be based on the Kibbles N Bits Plant in Lawrence, KS. The only one that I found that uses corn syrup. Yuengling Brewing in Tampa, FL., would be the inspiration behind my choice for a brewery.

    Ameri Metal Containers or AmeriCoil Steel
    The second industry in Homer could be satellite industry to Imperial Canin called Ameri Metal Containers, a can manufacturer that would receive steel coils. My second choice is Americoil Steel, a coil processor which takes steel coils and slit them down to smaller sizes. I leaning towards the coil processor because they can be large or small industries that could be easily modeled. Delaco Kasle in Woodhaven, MI., and and D'Coil Steel in Sheffield Village, OH., are what I consider small facilities. 

    Pulaski will have two rail served industries, Great Lakes Ammonia, a anhydrous ammonia dealer, and Temple-Inland, a corrugated box manufacturer.

    Great Lakes Ammonia
    I got the ideal for Great Lakes Ammonia from Jack Hill's post on the Atlas Forum, Another EZ to model, prototype industry. After doing some research on this industry, I found out that Tanner Industries owns this facility and many others like it. Here is the birds eye view of the facility near Tamaqua, PA., and the one near me in Inkster, MI.

    Temple-Inland Dock
    Temple-Inland is based on the plant in Biglerville, PA.. The plant receives linerboard and corrugating medium in boxcars and pressureaide covered hoppers of corn starch at the warehouse and ships out boxcars of scrap card board from the dock. 

    Temple-Inland Warehouse
    If you want some great information on how the Temple Inland plant in Biglerville, Pa., operates, check out Jack Hill's Blog, Welcome To The New Castle Industrial Railroad, where he explains it in detail.

    Chlor Pak
    There is only one industry in Hanover, Chlor Pak, a bleach packaging plant. This neat little industry will receive covered hoppers of plastic pellets to make plastic bottles and tank cars of chlorine to make the bleach. Also, it will ship out bottles of bleach in boxcars. This industry is based on a facility in Michigan City, In., owned by On-Line Packaging.

    Wolverine Cement & Moscow Team Track
    Moscow is home to Wolverine Cement, a cement distributor, and a team track. 

    MSCR Engine Service Facility
    The engine service facility for the MSCR is also located in Moscow


    Thursday, September 16, 2010

    WIRING

    In choosing a control system for my Michigan South Central layout, I wanted a system that would be both simple to install and simple to operate. I decided to stay with the tried and true cab control using common-rail wiring. It works perfectly for me, and the thought of adding decoders to the eight engines isn't in the budget.

    The Control Master 20 by MRC was my power pack of choice. The CM-20 comes with a handheld throttle with memory that plug into standard telephone jacks. These allows me to run a train, unplug the throttle from the jack, and move to another jack while the train keeps moving at the same speed and direction. I needed two CM-20s, but at $200.00 bucks apiece I knew for a fact I didn't want to spent that kind money. Ebay was the answer for this problem. I won one for $95.00 dollars including S&H in April 2009, and the other for like $100.00 dollars including S&H in July 2009. Combine I didn't spend the money for the price of one. Good Deal!


    After getting the second CM-20, I noticed that they were different. The 2nd CM-20 didn't have a cooling fan and I thought I've been had. It turned out that there are two different versions of the CM-20. Version 1 has a 80VA output with a cooling fan and Version 2 has a 100VA output that doesn't. Glad I found that out before giving the seller on Ebay a piece of my mind.

    I spent the following months gathering all the other materials needed to wire up the layout. My intension was to wire the layout over my 4 day Christmas weekend and my 4 day New Years weekend. I got started on wiring the layout on December 27, 2009, using a color code system to keep the wires organized and to cut down on mistakes, which do happen. Kato Unitrack uses blue and white wire in its terminal track, so I choose blue for the blocks and white for the common rail. For the two throttles I used red wire for one and black for the other. I drilled holes thru the foam and plywood where the feeder wires will go. Next I put in two terminal strips at each end of the layout and ran the common rail bus wire for the lower level part of the layout between them and called it a day. I used white 12-gauge stranded wire for this.

    Wiring was in full swing the following weekend. I installed the common rail wire for the upper level, this time using 14-gauge stranded wire. Why 14-gauge you ask? The 50 feet of 12-gauge I had purchased from Lowes wasn't enough so I had some white 14-gauge wire left over from earlier layouts and used that. I connected all the white feeder wires from the track to the common rail bus and that portion of wiring was done.

    The power pack wires was the next thing on the list to do. I used a spool of red and a spool of black 20-gauge wire from Atlas for this. I ran the red for cab 1 and black for cab 2 around the front of the layout to the terminal strips at each end.


    Constructing the six control panels need to operate the layout came next. The control panels consist of a Plexiglas front, paper with a color schematic drawing in the middle, and the base, which is the fascia of the layout. The panels also have SPDT center off toggle switches showing the blocks condition: Left = Cab 1, Center = Off, Right = Cab 2.


    I didn't want the panels to take up a lot of space on the fascia so I decided to make them 4.25" high by 14" long. This size allowed me to print out two decent size schematics on one sheet of legal size paper. I drew the schematics on my computer using the XtrkCad program and printed them using a color printer.

    The only difficult part of building the panels was the cutting of the Plexiglas. I used the score and snap technique to get the size panels I needed using a Plaskolite Optix knife. Once this was done, I drilled four small holes in each corner of the Plexiglas for the mounting screws. I took my time doing this because I didn't want to crack the Plexiglas.

    Now I mounted the paper schematic and Plexiglas on the fascia and drilled small pilot holes for the toggle switches. I had to be careful not to drill holes near a girder in the benchwork because it would interfere with the installation and wiring of the toggle switches. I used a bigger bit to drill the final holes for the toggle switches and then installed them from the back of the fascia through the holes on the control panels and screwed on the toggle switch nuts. I wired the toggle switches using the daisy chained method instead of individually, which uses less wire and makes the panels look neater. The switches I got had screws in them to make wiring them easy. NO SOLDERING!


    I built a small shelf under the staging area of the layout for the base units for the two MRC Control Master 20 power packs to rest on and then wired them up.


    The handheld throttle on the CM-20 use a standard four wire telephone cable and connectors. I put in six one-jack phone plates in three handy locations around the fascia. Three for cab 1 and three for cab 2.


    I wired them up using standard telephone cable from cab 1 to jack of the first plate. I ran another set of wires from this to the jack of the second plate, then another set wires to the third. I repeated the process for cab 2. Now that I had the layout wired, I checked it out!  I placed an engine on the track, turn on the power, and ran it on every single inch of track. Just my luck, I had a couple of blocks wired to the wrong toggle switches on one of the control panels. Never fails when its come to wiring. I really enjoyed making my control panels. They are simple and easy to understand, even a caveman can read them.


    Wednesday, September 15, 2010

    FASCIA

    After months of doing nothing to the layout, I finally got started on the Fascia on 6-28-09. I went with a 4x8 sheet of 3/16 Masonite hardboard which I got back on 4-11-09 from Lowe's for $12 bucks. I had them to cut the sheet into four 1x8 sheets. All I had to do was make the final cuts to the right length to match the benchwork. Shoulda had Lowe's to do that too!

    I align the top of the Fascia with the top of the plywood and not the foam. I will bevel the foam down to the Fascia to make a soft edge which will get rid of the table-top look.


    I couldn't make up my mind on what color to paint the Fascia, black or green. The green would blend with the scenery around the edges and the black would make the eye focus more on the top of layout. I went with a semi gloss black. I went to Lowe's the following morning, pickup a small can of paint, and had the Fascia painted by mid afternoon.


    Once the paint dried, I beveled the foam down to the Fascia. It got rid of the flat look from the edges of the layout. Messy work! Blue particles all over the place again!


    FOAMBASE

    I got started on the foam base of the layout on 02/21/09. I when to Lowe's and purchased three blue 4x8 2" thick foam boards along with some Olympic Arabian Sands paint, painting utensils, wood glue and lights for the room. I don't know about Home Depot's 2 thick boards but Lowe's has score lines already in the boards. It was easy handling the boards by snapping them into 2x8s. I used a serrated steak knife to cut the boards to the shape and sizes I needed. For final contouring I used a Surform tool, a very messy way by doing it like this. There was small blue particles stuck to everything after I was done!

    I used wood glue to secure the lower level foam boards to the OSB. I didn't secure the foam for the upper level because I still needed to shape the foam so that it won't interfere with the lower level track.


    LANDFORM

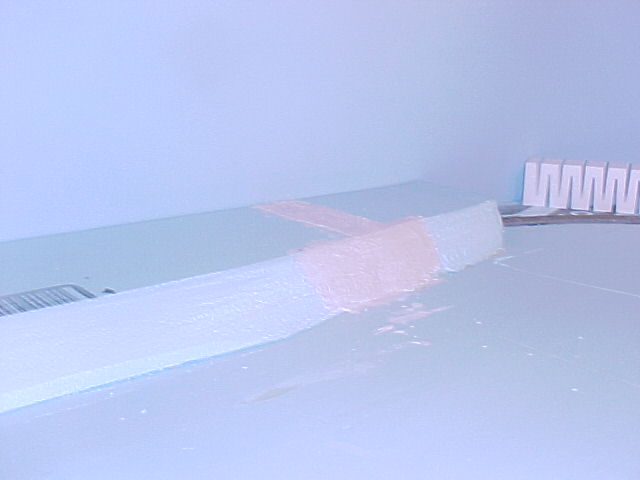
    After carving and shaping the foam on the lower level and getting those blue particles everywhere, I decided to go with a less-messy way of carving the foam for the upper level. So I went to the Hobby Shop and purchased the hot wire tool from Woodland Scenics. This was a complete waste of $40.00. I had a very hard time cutting and shaping the 2" foam with this thing. It was slow and the wire kept breaking. I went back to the messy way of cutting and shaping the foam. After gluing the upper level down I used plaster cloth to cover the gaps between the foam boards.


    After the plaster cloth had dried, I painted the layout with the Olympic  Arabian Sands with a roller. Where the foam meets the backdrop, I used a Shur-Line Paint Edger to keep from getting the tan paint on the backdrop.


     I put the track back together so I could know where to place the Woodland Scenics 2% Incline Sets to get the track between the two levels. I used wood glue and foam nails to properly place the inclines.


    The only thing I don't like about the Incline Sets is that they have an unnatural square like look. I fixed this problem by gluing scrap foam in the front and in the back of them.


    After the glue had set, I covered the Incline Sets and scrap foam with plaster cloth and gave it a coat of paint. Now it has a more natural look.